EVALUATIVE METERING
Depending on your camera make, you will see a metering mode called Matrix, Pattern or Evaluative. This mode is typically the factory default on your camera and is considered a good all-around metering mode. When using your camera in auto, or setting your exposure on your own in a creative mode, this metering mode helps you or the camera to pick the correct exposure to suit the scene, taking into consideration both dark and light
area's. It's considered good for evenly lit subjects like portraiture and landscapes.
It's also the way to go when you're not sure which metering mode to use. This
is the reason why it's the default setting for fully automatic camera settings.
As you can see by the images below, matrix, pattern or evaluative metering works by dividing the frame into zones, taking separate readings from each zone. The camera then takes a guess at what parts of the scene are important and exposes accordingly. For the most part, it does a pretty good job at picking the correct exposure.
But what if our subject is not evenly lit? Let's look at
SPOT METERING
Spot metering
should be used when you want to take an exposure reading on a specific area. It evaluates light from a very small area of the scene and allows you to set the proper exposure.
In the first example the camera was set to Evaluative Metering. The meter looked at the whole scene and saw Highlights (water) Midtones (sky) and Shadows (land). It tried help me set an exposure that would capture all lighting conditions. But the image ended up being a bit murky and underexposed.
When I switched over to spot metering, I placed the highlighted focus point I see when looking inside of my viewfinder (on my Canon I use the center point) on the midtone area (the sky) and half press the shutter button (or back button focus button). This activates the in camera meter. I set my exposure according to the in camera meter and my photo brightens up and looks something like this.
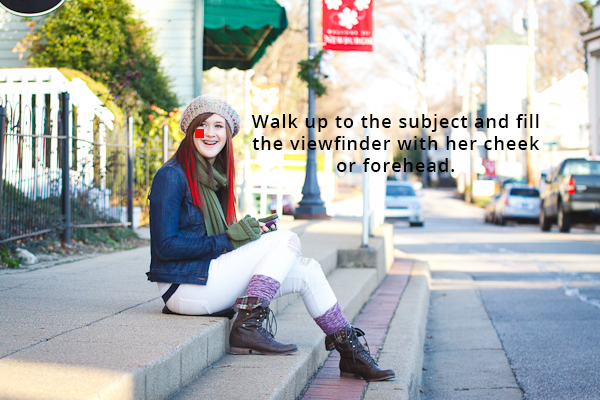
Now imagine you are out taking a picture of a person. You want the most important part of the photo to be exposed properly, the face. You want the camera to ignore the areas surrounding the person that are bright or in deep shadow.
You have two choices:
1. Put your camera into Spot meter mode and take a meter reading on your subjects face from where you are standing to compose the shot.
or....
2. Choose any metering mode. It will not matter. Walk up to your subject, fill your viewfinder with her cheek or forehead, take a meter reading and set your exposure.
Now walk back to where you want to compose your shot, ignore what your camera meter is doing and do not change your exposure. Take the shot. You should see the same results, a properly exposed photo. Why? Because there was no background in viewfinder, so basically you manually controlled what the meter read or ignored.
There are a few other metering modes on your camera. Many people don't use them, but they basically work the same way. Each mode looks at a certain amount of area to determine proper exposure for a scene and ignores areas. Here is a diagram that might help you understand what each metering mode is looking at and what it is ignoring.
I hope you enjoyed this lesson on metering. If you'd like more classes, please feel free to contact me. I offer one on one and group lessons.
Email me at jodie.minniear@gmail.com
Happy Shooting!
Jodie


No comments:
Post a Comment